Wednesday 28 June 2023

MAC Attack - Assassination

So I guess when I said "I'm making good progress with Mythic Bastionland as my main focus" I awakened the dormant curse of distraction, because I spend yesterday dicking around with MAC Attack. Yes I even wasted time with a little cover mock-up.

Well you know how this goes by now. This enemy can't be fought, it must be fed.

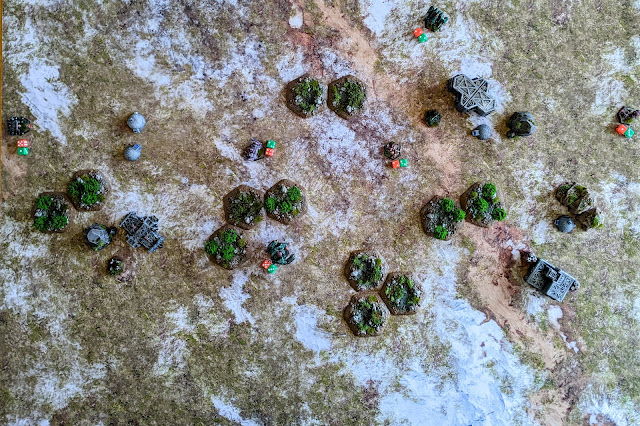
So today's post is a Battle Report for a playtest of MAC Attack. This isn't designed to teach the game, as much as give a general impression of what a small clash looks like.

If you want to follow along with the rules then go and read them, they're only a few pages.

Recent Changes

This is one of those games I keep tinkering away at in the background, so it's a sort of game design by a thousand cuts method. Since I last posted about the game the big changes are:

  • Simplified movement options
  • Simplified MACs, which now all get 6 modules
  • Simplified weapon ranges
  • Reworked weapon types to give more variety
  • More interesting hardware choices

The Forces

For this one we're using the minimum viable force of 3 MACs with a few Auxiliary Units to round us up to 50pts each. We're using the random scenario generator included in the doc.

THE GREEN COMPANY 
Mercenaries sent in to disrupt a local militia group. The Grizzly is a ridiculous melee MAC loaded up with one-shot explosives to fire off as they close in. The Buzzard is a long range fire support MAC also packing one-shot X-type weapons alongside their MagCannons, accuracy enhanced by an Optics module. The Python is a cloaked sniper MAC, ideally sitting in cover taking long-range shots at slow-moving targets.


GRIZZLY (20pts) 
Class 3 MAC
1: LB3-X RocketPod
2: SP2-X DemoCharges
3: SP2-X DemoCharges
4: Assault Weapon
5: Assault Weapon
6: Servo

2x LIGHT TANKS (4pts)
Vehicle
LP1 RailCannon

BUZZARD (16pts)
Class 2 MAC
1: LP3 MagCannons
2: LB2-X MacroRockets
3: LB2-X MacroRockets
4: Optics
5: Coolant
6: Coolant

PYTHON (10pts)
Class 1 MAC
1: LP4 IonBeams
2: Optics
3: Cloak
4: Patch
5: Patch
6: Insulant

THE RED MILITIA
Local defence forces trying to regroup at a nearby stronghold.

The Shocker is designed to fire off as many piercing shots at possible, best used against slow moving targets. The Quicksilver uses thermal weaponry to flush enemies out of cover or overload the heat capacity of rival MACs. The Guerrilla is held together cost-reducing Patch modules and packs a nasty punch with a single salvo of cluster bombs, reduced to a somewhat pathetic gun array when those are expended.

SHOCKER (20pts)
Class 3 MAC
1: LP4 GigaPulser
2: LP2 HeavyPulser
3: LP2 HeavyPulser
4: LP1 Pulser
5: Insulant
6: Insulant

3x HEAVY INFANTRY SQUADS (9pts)
Infantry
2x SP1 IonGun

QUICKSILVER (11pts)
Class 1 MAC
1: SB3-T Burner
2: LP1-T PlasmaGun
3: Servo
4: Patch
5: Radiator
6: Radiator

GUERRILLA (10pts)
Class 1 MAC
1: SB3-X ClusterBombs
2: SB1 GunArray
3: Cloak
4: Radiator
5: Patch
6: Patch

The Battlefield Marked with 9 potential deployment positions as per the scenario generator.

Green Objective
Destroy the Red Guerrilla MAC, piloted by a charismatic militia recruiter.

Green Deployment
Turn 1 - Grizzly and Tanks enter from point 1.
Turn 2 - Buzzard enters from point 2, Python enters from point 4.

Red Objective
Extract the Shocker MAC from point 1, where they are able to call in for support.

Red Deployment
Turn 1 - Shocker and Infantry enter from point 7.
Turn 2 - Quicksilver enters from point 6, Guerrilla enters from point 9.

Twist: Coldsnap - MACs Cool an extra Heat in the Cooldown phase.

In MAC Attack objectives are checked at the end of each turn from the end of Turn 3 onwards. If both sides complete their objective on the same turn then the side that sustained the fewest points of casualties wins. Here Red will have to juggle keeping both the Shocker and Guerrilla alive. The latter especially really isn't built to sustain much fire, so the question is whether Green can force these two units into a fight.

TURN 1

The two big MACs stomp onto the field, flanked by their infantry and tanks. The Shocker is keen to avoid engagement, but the Grizzly rushes into position to get line of sight on its target. It's a longshot but the Grizzly pilot unloads his precious LB3-X rockets toward the Shocker, hoping for a lucky hit. Two of the rockets land, damaging the Shocker's weapon-cooling insulant modules, but no first blood just yet.


TURN 2

The rest of the forces join the battle, rushing in to help the big MACs out. Red plays it safe with the Guerrilla, the target of the Green attack, moving them up behind a factory as cover. Meanwhile the Quicksilver dashes into a more open firing line, facing off against the Railguns of the Green tanks. Bold gambit? Cunning diversion? Bad positioning? We'll see. 

The Shocker pushes its engines to the limit, strafing out of the firing line of the Grizzly, as the brave red infantry square up to the colossal ursine MAC. There's no time for the Shocker to relax, as the green Buzzard MAC slinks onto the field, lining up its array of long range weapons at the Shocker.


As it so often the case, the order in which the units are activated in the Attack Phase is going to be crucial. Who's fastest on the trigger?

The green tanks loose their railguns at the Quicksilver, putting a dent in its PlasmaGun, but then the Buzzard unloads both batteries of Rockets at the Shocker, dumping a whole battle's worth of payload onto the towering MAC. When the dust clears, the Shocker is still standing. Its weapon insulants are destroyed, its smallest Pulser broken, and its reactor flooded with coolant... but it still stands with both main guns intact.

The Grizzly stares down the red infantry, deeming them a waste of precious demolition charges, watching as the flanking Python cuts them down with its twin IonBeams. Just one squad remains to return fire, cutting down one of the Grizzly's demolition launchers, leaving its right forearm completely exposed.


As the Guerrilla lurks out of harm's way, the Quicksilver incinerates a green tank with its PlasmaGun.

Amid the hazard lights and warning sirens of the barraged Shocker, the pilot elects not to fire, hoping to get their heat under control to allow for a more decisive strike next turn, and eventually a dash toward the extraction point.

TURN 3

As the Grizzly charges toward its prey, the Shocker spins around, backing up, hoping to be able to blast away the tireless predator. As the Python and Buzzard try to line up their distant fire support, the red Quicksilver dashes across the field, hoping to use its thermal weaponry to tame the Grizzly.

Sure enough, the Quicksilver is quick on the trigger, lighting up the Grizzly with both flame and plasma, sending its heat sensors soaring, but not quite enough to completely declaw it for this round. Meanwhile, the red infantry sear away at the Grizzly with their IonGuns, cutting through to the very structure of the bear.

On the horizon the Buzzard, rockets depleted, fires its MagCannons at the Quicksilver, shaking its modules but mainly causing cosmetic damage. The Python lines up its IonBeams at the Shocker, the first lance firing wildly wide of target. The second shot never comes, as the MAC enters emergency heat lockdown, the pilot squeezing desperately at the locked trigger.

The Shocker itself heaves its LP4 GigaPulser toward the Grizzly and unleashes a blinding beam, the last of the Grizzly's demolition charges exploding, rupturing its internal structure. Despite this... the Grizzly stands, close to meltdown, with only its claws still intact.

Before the red pilot can assess their exit strategy, the railgun of the remaining green tank barks into life, cleaving the Shocker's Gigapulser from its arm, sending a chain reaction into the MACs fusion drive. It's not quite critical damage, but now both of the big MACs on the field are a single shot from meltdown.

TURN 4

The Grizzly pilot, bombarded by alerts and sirens, makes their desperate choice, charging headlong into the Shocker. The impact sends sparks and smoke billowing from both MACs, their reactors critical, meltdown imminent, auto-eject countdown sequence initiated. Neither MAC will see the end of this turn.


The Quicksilver darts away from the impending explosion, setting sights on the Buzzard and Light Tank that have been harassing the Shocker from the other direction.

The Python, facing reactor problems of its own, hunkers down in position, desperately trying to vent heat from its core. The Shocker, spotting opportunity for a final attack, shambles through the woods, its flaming fuselage setting trees alight, hoping to use its lone functional weapon against the distant sniper MAC.

The Quicksilver floods the final green tank with fire, cooking its crew alive, before sending a bolt of plasma into the body of the Buzzard, its pilot undaunted while behind the stick of such a well-cooled MAC. The Buzzard returns fire and catches the fuel tank of the Quicksilver's burner module, sending the weapon up in flames.

Meanwhile the Python sends a streak of fire toward the Shocker, blasting another chunk of its internal structure, but its Pulser stays intact, firing one last shot into the Python, albeit just cosmetic damage.

The pilots of the Shocker and Grizzly can't hold out any longer, both ejecting from their cockpits as the two giants of the battlefield erupt in white flame, leaving two heaps of irradiated scrap where they once stood.

TURN 5

With the Shocker destroyed, Red stands no hope of achieving their objective, so their only chance of victory is to wipe out the Green forces before they can destroy the Guerrilla.


The Quicksilver rushes toward the Python, a plasma bolt sending the green MAC's heat problems into new heights, components being ejected as emergency countermeasures are activated. The Buzzard blasts away at the Quicksilver with its MagCannons, sundering the red MAC's Insulant module, crippling its PlasmaGun, and blasting apart external plates.

The red infantry, having scurried into the nearby woods, take the opportunity to further cut away at the Python with their IonGuns, yet the green MAC still stands.

In the distance, the Guerrilla finally starts to charge toward the battle, realising the time for lurking has passed, but can't get close enough to use its short range weapons.

TURN 6

The disarmed Quicksilver makes a desperate charge at the Python, ripping one of its IonBeams from its shoulder, but the impact is too much for the red MAC, and its meltdown alarm starts blaring. Still, the Quicksilver at least manages to block the Python's line of sight to the Guerrilla for this turn.

The Buzzard begins the firing, blasting a hole in the Guerrilla's armour, exposing its vulnerable core. Through careful manoeuvring by the Buzzard, the Guerrilla is still unable to bring its short ranged weapons to bear.

Meanwhile the red infantry finally pierce the heart of the Python, igniting its reactor and initiating meltdown. Mirroring the Grizzly and the Shocker, the Quicksilver and Python explode locked in a brawl as their pilots eject to the sky. 

TURN 7

The Buzzard and the Guerrilla are the last MACs standing, a single squad of red infantry lurking in the woods.

The infantry move out into the open, hoping to prevent the Buzzard from retreating out of range of the Guerrilla again. The Buzzard bounds toward the squad, crushing them beneath its metal claws, before turning to face the approaching Guerrilla.

Now the two final MACs face off... the battle may be decided by who can fire first.

The Guerrilla grabs the initiative, unleashing its full salvo of SB3-X ClusterBombs. The explosives detonate the Coolant modules that have been protecting the Buzzard throughout the battle, sending a chain reaction down to the fusion core and initiating Meltdown.

The Buzzard has one chance to take out the Guerrilla. The whole battle hinges on this shot.

MagCannon fire rains down on the Red MAC, sparks flying from its bomb capsules, gun array, cloak module... but the core remains untouched. As the Buzzard vanishes in a flurry of reactor explosions, The Guerrilla pilot surveys the empty battlefield.

Victory..?

THOUGHTS

It feels like the game is in a good place right now. Movement, damage, weapon types all feel more solid than they did in my last playtest.

As the game came down to "Last MAC Standing" you could argue that the Objectives were irrelevant, but this is a good example of a battle where the objectives clearly influenced the way the forces played, even if neither objective determined the final victory.

I've mentioned before that one of my favourite things about Battletech is that some Mechs are just kind of badly designed, and there's usually a setting justification for that. These MACs were all designed by me, but I definitely felt frustration at the design of some of them. The Python works great if you're standing still and sniping, but runs into real heat problems if you lose the Insulant module and find yourself needing to move around a lot. The Grizzly looks imposing, but actually getting into melee to use its claws relies on a bit of luck in the initiative deck. The Buzzard felt sleek and effective pounding away at long range, its advanced coolant modules keeping it nice and frosty, but those same fragile modules spelled its doom when it finally came under fire.

Giving MACs this sort of character, where you kind of have to learn to drive them, is right at the core of my goals for this game, so it's great to see that coming to life.

The Auxiliary units feel about right. Giving Infantry the option to take two Power 1 weapons makes for some dangerous little units, but still easy enough to squash if you commit to it. Of note is the Grizzly's decision not to "waste" its DemolitionCharges on the final squad of infantry, as that very squad was instrumental in taking down all three Green MACs by the end of the game.

Oh, and a confession. I completely forgot to apply the Twist effect to the battle, and Coldsnap could have certainly helped out MACs like the Python, who suffered badly with Heat toward the end of the game. I also completely forgot to have MACs taking 3 or more hits from a single attack take a Systems Check to avoid falling over.

I'm hoping these oversights are a side-effect of running both sides while also documenting the game, and should be easily remedied when playing under normal conditions.

----------------------------------------------------------------------------------

This post was originally sent as a reward to all Patreon supporters, and is released freely on this site the week after its original publication.

If you want to support my blog, podcasts, and video content then head over to my Patreon. 

Wednesday 21 June 2023

Valiant

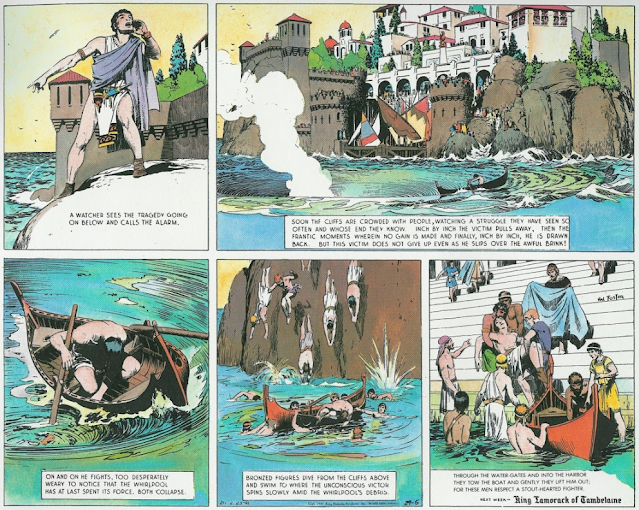
I vaguely recall Prince Valiant being a TV cartoon when I was growing up. I remember dismissing it pretty quickly, I forget why.

Occasionally I'd see the comic strip in a newspaper, but I didn't get how somebody could follow a story delivered in such tiny portions over weeks and months.

Then some thirty years later I was talking with Sean McCoy about Mythic Bastionland and he recommended checking out the old Prince Valiant comics.

As these comics started in 1937 I think I'm pretty late to the party on this one, but it turns out they're really good. I'll lead with a disclaimer that this comic has been heaped with praise over the last 80+ years, so there aren't many surprising insights here, but as this was a blind-spot for me I thought it was worth talking about.

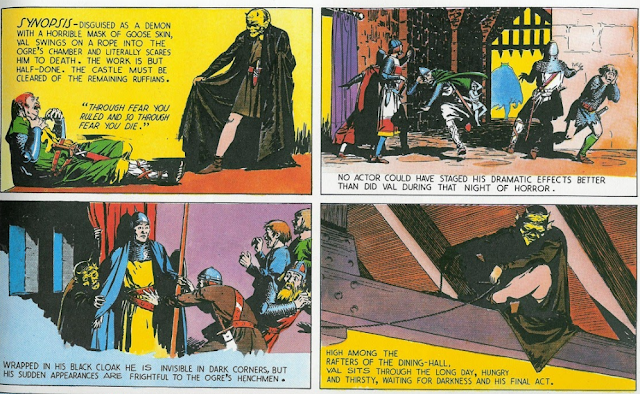
The artwork is lush, dynamic, and detailed, the stories break-neck paced, characters are archetypal but still surprisingly captivating.

Val often wins the day through brute force and plot armour, but just as often has to resort to clever problem solving. He kludges together makeshift a shield from his clothes, a lasso from his belt, disguises to trick castle guards. When blocked by a horde of horsemen he scares their resting steeds into stampeding over their camp. When overrun by a siege he tricks the invaders into breaking through a false gate, leaving them trapped and bombarded by rocks. Real OSR stuff. 

He's always journeying somewhere far away or eagerly travelling back to Camelot. There are moments of adventure at each destination, and respite back at home, but they don't linger for long.

A significant detail is the lack of speech bubbles that you might assume from a comic. Instead you get a small piece of narration alongside each piece of art, which you can enjoy mostly free from text.

It's not super deep, of course, but there's a sort of driving pace and rich flavour to the whole thing that just keeps me excited to see what happens next.

Lots of similarities to how I like to run RPGs.

Parallel to this, I had the Prince Valiant Storytelling Game on my watchlist for a while, and finally managed to pick up a copy. Written by Greg Stafford, it's an interesting contrast to Pendragon.

Some points of note:

Characters divide 7 points between just two Abilities, Brawn and Presence, essentially physical-stuff and non-physical-stuff. With a maximum of 5 points in either, you're essentially choosing between four different profiles, and it gives the player a very immediate choice between two directions for their character, and gently nudges you toward having an outright weakness, as a score of 2 is considered "below average". Of course the game totally cheats when it comes to the knightly characters from the comic, making them above-average in both scores.

Skills are as you'd expect, adding to your Brawn or Presence score as appropriate in specific situations. They're a good evocative list, though, with things like breaking social skills into Courtesie, Glamourie, Fellowship, and Oratory. This is a fine line to walk, but here it feels appropriate.

It's essentially a die pool system, but you throw coins instead of dice, counting the heads as successes. I like the simplicity of this but hate the feel of it. Throwing a pile of coins feels innately less satisfying to me than rolling a handful of dice. I'd just use d6s and count 4+ as successes, no mechanical difference.

It's one of those games where the GM sets a difficulty level for the roll, typically 1-5 successes needed. Not a big fan of this, but it does state that most tasks should just use a target of 3 successes

There's a weird system where if you roll all successes then you get a complete success, giving you an extra success on the roll. I guess this is there to give a chance of underdogs seizing a surprise victory, but it has some odd effects. The example task given in the book is lifting a rock (no, really) requiring 3 successes and using Brawn. It states "If you had a Brawn of 2 or less you would have no hope of lifting the rock. If you had a Brawn of 5 you would have a good chance of throwing three or more heads, thus lifting the rock".

Well... it's not quite that simple. Throwing 2 coins gives a 25% chance of getting two heads, which would be a complete success, raising the number of successes to 3 and lifting the rock.

Throwing 3 coins only gives a 12.5% chance of getting the required 3 Successes, as getting just 2 doesn't trigger the complete success bonus as before, so you need to get all 3 naturally. Strangely the Brawn 2 character is more likely to succeed than the Brawn 3 character.

To deal with the above I'd be tempted to try an alternative die system to achieve the desired effect in another way. Roll the die pool as normal. 5s count as one success, 6s count as two. Same mean result from each die in the pool, but the distribution is slightly different.

Using this system the Brawn 2 Knight has an 8.3% chance of lifting the rock while the Brawn 3 Knight has 20%. Seems a bit more like what you'd expect. Certain tasks are harder with this system, others easier, but I think it all works out alright.

Weapons, armour, and shields all simply add to the number of dice/coins you throw in combat, but armour also subtracts it's value from situations where it would be a hinderance. Nice and simple for a game that isn't really about the specifics of how a sword is different than an axe. If you've got Brawn 4, the Battle Skill at 2, a sword (1) and medium armour (2) then you're totalling those up to roll 9 dice in this fight.

Combat and other opposed rolls see characters comparing the number of successes rolled. The loser discards coins from their pool equal to the difference in successes rolled, then the combat continues until one side has lost all of their coins. Mass battles use a similar system with a few little extras. It's fast, swingy, and gives ample opportunity for retreat or surrender instead of fighting to the bitter end.

Fame is the goal of every Knight, and you earn it mainly through succeeding at stuff. More Fame boosts your skills and there are some nice touches where it can be compared with other characters to see if they should defer to you socially, if you get a bonus to Presence around them, or even if a particularly high presence is likely to cause would-be attackers to think twice before engaging you.

The Advanced Rules section is a mixed bag. There are extra skills, some of which eat into the areas covered by the core list. Alternative character types are fun, opening up from the standard knights to allow Vikings, monks, hunters, and other such options.

Also in this section is the Traits system, where your character might be noted as Foul-Tongued, Reckless, Melancholic, Lustful, or others from a pretty thorough list. This is kept secret from other players, but you can sneakily show it to the GM right before you do something dramatic linked to your trait. Let's say our Reckless knight charges into a battle they cannot possibly win. If the GM approves, you get some more Fame points. It's touching on the same ground as traits and passions in Pendragon and I actually quite like this method. I might change my mind after seeing it in play, but it feels nicely implemented to me.

There are a bunch of mini-scenarios called episodes in the back of the book, and I picked up a supplement containing even more. They're somewhat linear, but short enough that they probably avoid feeling too much like a railroad. I can see them being fun if strung together across a more open ongoing game.

Overall it's an interesting read and a valiant attempt to create an RPG that focuses on pace and accessibility over rigorous detail.

Unfortunately this game is pretty hard to get hold of. I was lucky enough to get a second hand copy at a very reasonable price. If it sounds at all interesting to you then I'd recommend grabbing a copy if you spot one.

 ----------------------------------------------------------------------------------

This post was originally sent as a reward to all Patreon supporters, and is released freely on this site the week after its original publication.

If you want to support my blog, podcasts, and video content then head over to my Patreon. 

Wednesday 14 June 2023

Admiring the Scrap Heap

Lately my posts have mostly been content pulled straight from the most recent changes and additions to Mythic Bastionland. This has let me focus on grafting away at that game, not getting bogged down in writing extra content.

Except this week my progress has been:

  1. Think of a radical change to the game, right at the core of the system.
  2. Run an initial test of that system and get excited that it would streamline things and create some fun moments in play.
  3. Get over-excited and go through the document, applying this change across the board.
  4. Run some more tests of this new system and... find some unfortunate knock-on effects that would need fixing.
  5. Spend time applying those fixes to the document.
  6. Try the system out again... I’m not so sure about this actually.
  7. Take a hard look at this new system, comparing it to the existing system.
  8. Full of dread, face the facts that the original system was probably better overall.
  9. Feel intense relief that I backed up the document before I made all of these huge changes.

So I sat down this morning to work on Mythic Bastionland, staring at a document that is very much in the same place as it was last week.

Feels bad.

So instead I’m drawing on an old cliché. 

I haven’t failed to make the game, I’ve succeeded in finding another way not to make the game.

There’s a branch of reality where I powered through with this change. Perhaps I didn’t back up the document, or I just couldn’t face undoing all that work. Perhaps the changes made for a better game, perhaps they made it worse and alienated the players that wanted something that still felt close to ITO and EB in mechanics.

We’ll never know, but right now I’m happy with this reality.

What was this big change anyway?

WELL SINCE YOU ASKED, but remember this is now right in the bin. Maybe something for a future project, but it didn’t feel right for this one.

Remove Guard entirely. Armour reduces incoming damage as normal, then the target decides which Virtue to assign the damage to. If there’s damage remaining it goes to another Virtue until it’s all been absorbed.

I tried a few variations of the fine details. What does having 1/2/3 Virtues at 0 mean? Is there an effect when a Virtue gets cut in half? How are Virtues restored now? Are they harder to restore when they’re at half/zero? When do you lose access to each of the Feats?

Details aside I do think there’s something there, and there’s a certain appeal to removing Guard entirely when we already have Armour and three different Virtues to work with, but the result was a system that just felt a little too far removed from ITO and EB and became a little too much about managing numbers. 

You also lose some of that immediate transparency where you can say “if you have Guard left you evaded the attack, if you took VIG loss then you’re wounded, if you lose have your VIG then you’re mortally wounded.”

So never say never, but for now this is firmly on the scrap heap. A scrap heap that should be viewed with pride, not shame.

----------------------------------------------------------------------------------

This post was originally sent as a reward to all Patreon supporters, and is released freely on this site the week after its original publication.

If you want to support my blog, podcasts, and video content then head over to my Patreon. 

Wednesday 7 June 2023

Mythic Crunch

UPDATE: There have been some extra changes to MB since I first published this, so don't be alarmed if some of the specifics don't match the most recent release. 

Well, I wouldn't say I'm in full crunch mode with Mythic Bastionland just yet, but it's certainly occupying a lot of my time. 

So that's why this week my post is actually more like a dive into the patch notes of the most recent update, which tore apart some key parts of the game.

Let's look at the casualties, with the caveat that I may end up reviving one or more of them down the line. 

Burdens are Dead

My precious flagship mechanic for this game! 

See this all started with Into the Odd. One of the very few mechanics in that game is that you can lose points from all three ability scores, but the subtext is that this will mostly happen to Strength. 

Way back I talked about the ideas of Stress and Strain to make the other two Ability Scores feel more like a resource that can be damaged or even spent throughout the game. 

Then why does Mythic Bastionland introduce a whole new system for wearing these knights down with three different types of burden when there are already three resource pools waiting to be used?

So we're trying it out. Burdens are dead, hit'em right in the Virtues instead, the new extra-knightly name for Ability Scores.

Self-Assessed Glory is Dead

Argh, this one hurts. I guess it started here or actually maybe here?

I think this one needs a whole post, but I think the old system of "judge how well you stuck to your oath and earn glory accordingly" works just-fine but just-fine isn't good enough for me. It kind of felt... inconsequential. 

So we're back to a more concrete set of ways for earning glory, still tied to the same principles of going out to find myths and protect the realm.

  • Survive to the end of a Season or Age
  • Venture into a Myth Hex
  • Resolve the final Omen of a Myth in a way that protects the Realm

It puts further onus on finding the Myth Hex too, which drives players out into the more remote parts of the realm. 

Travel Tasks are Dead

In playtests I found players quickly got to grips with the travel tasks, essentially a "free action" you could do while travelling. Common examples were plotting a route, making a camp... and... erm...

Yeah, it mostly became busy work where you'd always want to use a task to find a route, and make sure you set up camp before nightfall. Not much of an interesting decision.

So it's dead. Travel no longer relies on routes, but learning your way around and finding guides will help you better negotiate all this new stuff on the map...

Landmarks are Born

It's not all doom and decay. This new system gives some much needed flavour and utility to all of those hexes which aren't holdings or myths.

You've got three nice Landmarks:

Haven: Places of safety and comfort
Restore Vigour

Sanctum: Niches of calm and focus
Restore Wit

Monument: Symbols of hope and inspiration
Restore Grace

And three nasty ones.

Ordeal: Nature that fights your every step
Lose d6 Vigour

Gloom: Shadows that deceive the senses
Lose d6 Wit

Vestige: Past failures that dampen spirits
Lose d6 Grace

You'll put d6 of each down in your Realm and players won't know their locations until they discover them. They might even create or destroy landmarks through their deeds. 

They each get a prompt on the Knight and Myth spreads, so you'll have 72 little cues for each to get an idea of what the landmark actually is. 

Still lots of work left to do on this game, so I'd better get back to it. 

----------------------------------------------------------------------------------

This post was originally sent as a reward to all Patreon supporters, and is released freely on this site the week after its original publication.

If you want to support my blog, podcasts, and video content then head over to my Patreon.